Friday, April 24, 2009

Art History: Georgia O'Keeffe


Today the children listened as I read My Name is Georgia by Jeanette Winters. They were engrossed. We also glanced inside Georgia's Bones and Georgia O''Keeffe. After reading we looked at the gallery pictures and discussed the subjects she chose and the size she painted. One of her cloud paintings is 92" x 288"... WOW!


This weeks project was tissue paper paintings.

Supplies
paper
tissue paper
liquid starch
paint brush
small cups or egg carton cup into individual cups

Have children tear a circle out of tissue paper... bigger than a 1/2 dollar.
paint a circle of starch on the paper and place tissue circle on top, adding another coat of starch on top. The starch glues down the paper and sometimes (depending on tthe tissue) bleeds the color giving it a paintish quality.

Tear long petal pieces and repeat the starch painting process by placing them around the center circle. If you have a perfectionist who stresses out with the tearing... give them scissors.

flowers could be made more complex but with k-2 kiddos the radial design seems the easiest and most successful.
I stressed the difference between enough starch on the paper and gloopy, runny glops. I painted on the paper and asked them if it was gloopy and running off the page... Nooo. Is the tissue all sticking down.... yesss. I did this with a couple of pieces before I let them go on their own.

Tuesday, April 14, 2009

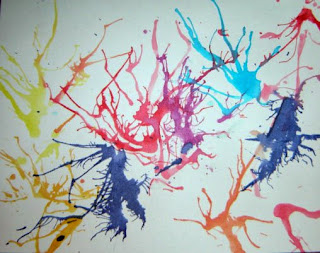
Art History: Jackson Pollock

I will be at the Midwest Homeschooling Convention during our next class. These are the lesson plans I wrote for my wonderful sub to present while I am gone.

Jackson Pollock

During Class

Invite kids to sit in front of the gallery. Remind them that all artists are different and that this one a lot of people think is REALLY different but art is an artists voice in picture… let’s listen to what Jackson Pollock is trying to say.


Read: Action Jackson… if you need to paraphrase some of the long passages feel free.


Look at the gallery


*point out all the paint cans in the barn… wow that’s a lot of paint

*which painting do they like the best? Why?

*which painting do they not like least? Why?


Yarn- select 4 children to stand up and hold a corner of the yarn rectangle. This is size of many of Pollock’s Drip Paintings. Lay it down; can the whole class fit inside? (standing, laying side by side, sitting…)


Project- Marble Painting -have students go to their seats and watch you make a painting first.

1. Write you name in the bottom right hand corner with the marker

2. Turn the paper over and place in the box, make sure the name is on the back or you won’t know whose is whose.

3. Place one marble in each color paint and softly stir around

4. Pick out marble with plastic spoon, taking care not to slop paint everywhere or pick up spoonfuls of paint… just the marble.

5. Place the marbles on the paper in the box

6. Roll the box around and back and forth … watching the magic before your eyes.

7. When finished, put marbles back in the paint; peel the painting out of the box and place painting on the papered table.

8. Repeat. They can do as many as time, interest, and paper allows for. It is a quick project. Keep one painting for me. Let them take the rest home.


Optional Project- if you need something else to fill time or attentions…. Straw painting, this one takes a bit longer and can be messier.

*Write you name in the bottom right hand corner with the marker

*Turn the paper over and place in the box, make sure the name is on the back or you won’t know whose is whose

*Place paint in jar, add a little water to thin.

*Place straw in jar and put finger over the end to pick up some paint

*Drop paint on paper and blow. DON’T SUCK!! When done add another color and repeat.

*When finished, put straws on paper towel, peel the painting out of the box, and place painting on the papered table.

*Repeat


Monday, April 13, 2009

Art History: Artist's Eyes

I am teaching a five week hands on Art History class for our Coop. I promised one of my virtual friends that I would share these lessons here. I hope you enjoy them!

Lesson 1- Artist's Eyes

Objectives
Art is a personal thing to the artist who is creating it. They are placing a piece of themselves into their work. So whether we love, hate it, or a totally baffled by it; you need to realize how personal it is.

Every artist is different so even if they capture the same subject in their work the finished project will be different.

Activities

Similar but Different
*Discussed how the children were similar (age, homeschool, geography...)
*Then gave each child identical papers and choice of identical drawing materials and had them draw the following: Blue Bird, Red Heart, Yellow Smiley Face, Green Circle, Brown Rectangle, Purple Triangle.
*Then with their drawings, we stood in a circle and held our drawings; Why are they different?
We had the same instructions, materials...

Artist's Eyes

*Just like our drawings were different, artist can create pieces about identical subjects but they will be different. We discussed similarities and differences in the works themed Madonna & Child and The Good Samaritan. (Not all of these images are identical to my posters but very similar.)


The Art Lesson by Tomie DePaola
*To prepare the kids for the fact that we will be making works inspired by Famous Artists and not just whatever they want and that this is a way of learning art, I read them the Art Lesson.


Name Plates
I will be keeping one piece each week to display at our end of the year concert so I let the kids decorate a name plate for my portfolio... any way they wanted.

Happy Hollisters


In a nearby town, our recycling service has a shop called Arts & Scraps. Arts & Scraps is a place where people and companies can drop off materials they feel teachers may be able to use... paper, fabric, test tubes, magazines... odds & ends. Homeschoolers are included in this teacher supply shop and everything is FREE. You only have to weigh what you take to show how many pounds of things are saved from the land fill. The last time G and I were in the shop, a lady was dropping off a van load of things. G wanted to help her, after much discussion about staying out of the way... it's KIND NESS Mommy, he helped her carry things. While he helped I perused the things she was bringing in, piles and piles of books. Among those piles was a set of old children's books, The Happy Hollisters. They were in perfect condition and looked really fun so we brought them home. We will be finishing the first one tonight, it is GREAT! Written in 1953, the books chronicle the adventures of the Hollister family. Their neighbors call them the Happy Hollisters because they are... happy. These are mysteries for children. I would recommend them as an intro to mysteries before Nancy Drew and the Hardy Boys.